How to Do the Barbell Back Squat
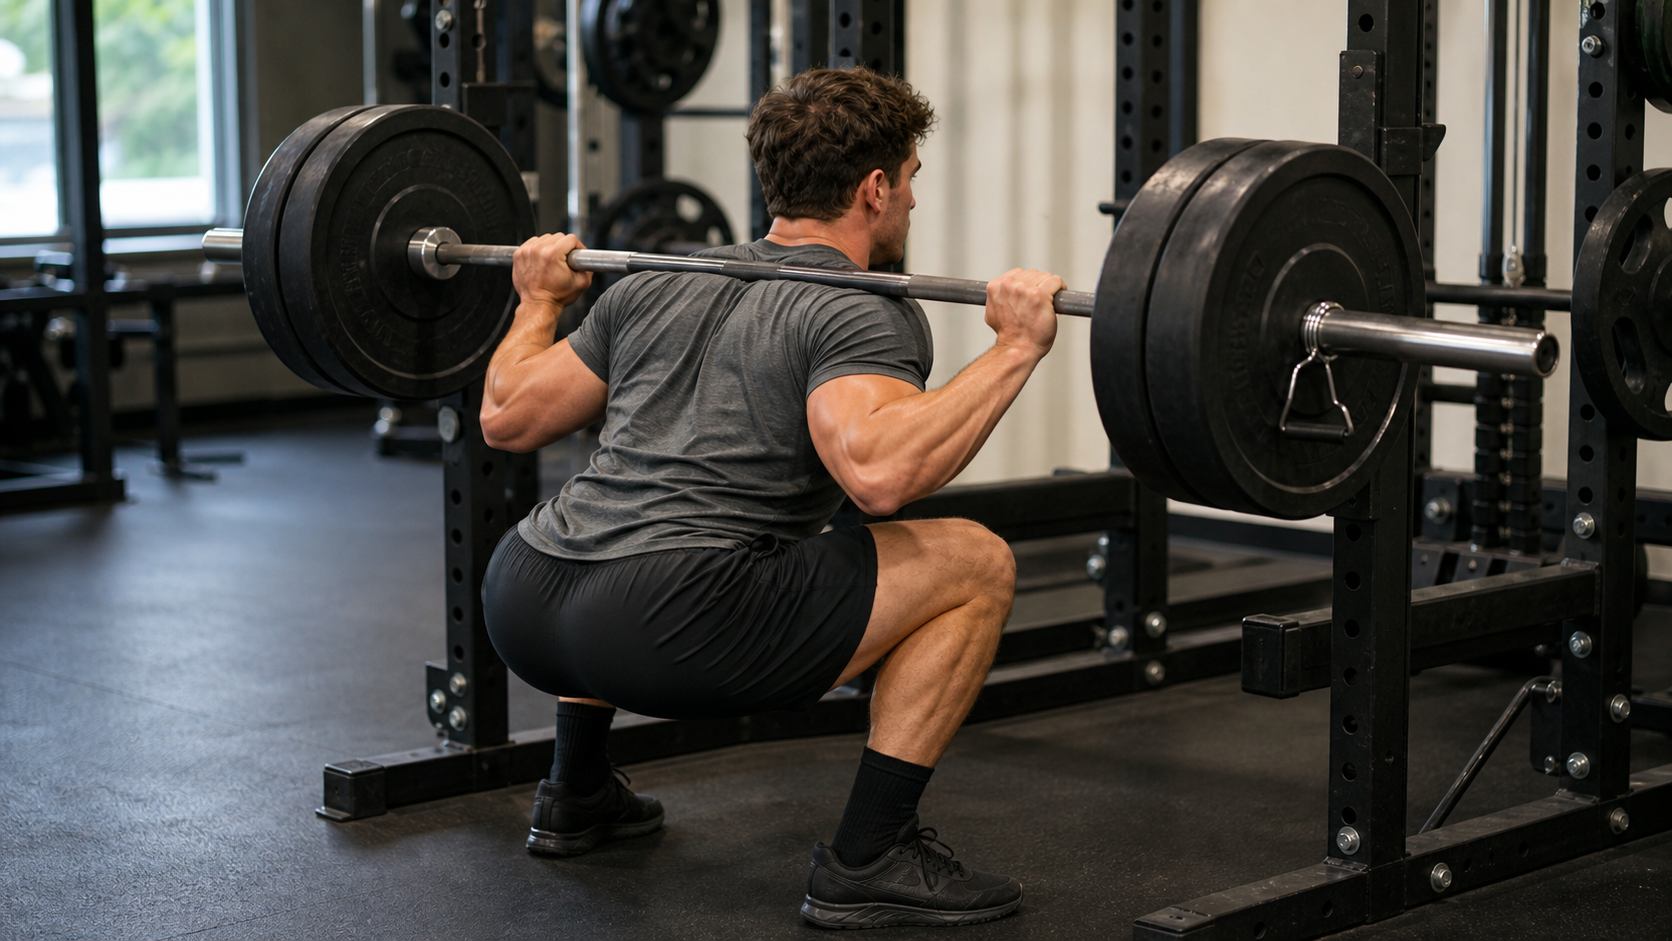
The barbell back squat trains the quads and glutes through a loaded knee and hip bend, with the trunk supporting the bar across the upper back.
Training scope: General exercise information, not an individual technique assessment. Editorial technique and programming guidance, not medical advice. Use qualified coaching or clinical care for pain, injury history, or movement-specific restrictions.
Primary muscles
Quads, Glutes
Secondary muscles
Hamstrings, Core, Lower back
Equipment
Barbell
Level
Intermediate
Type
Compound
Typical reps
Examples: 3-6 for strength practice, 6-12 for muscle-focused sets
The barbell back squat is a compound lower-body lift: your knees and hips bend while your trunk supports a bar across your upper back. It is a useful option for training the quads and glutes, not a requirement for every strength program.
It is also a lift where repeatable depth makes progress easier to judge. Adding weight while shortening every rep changes the task. Choose a controlled, pain-free range and record it consistently.
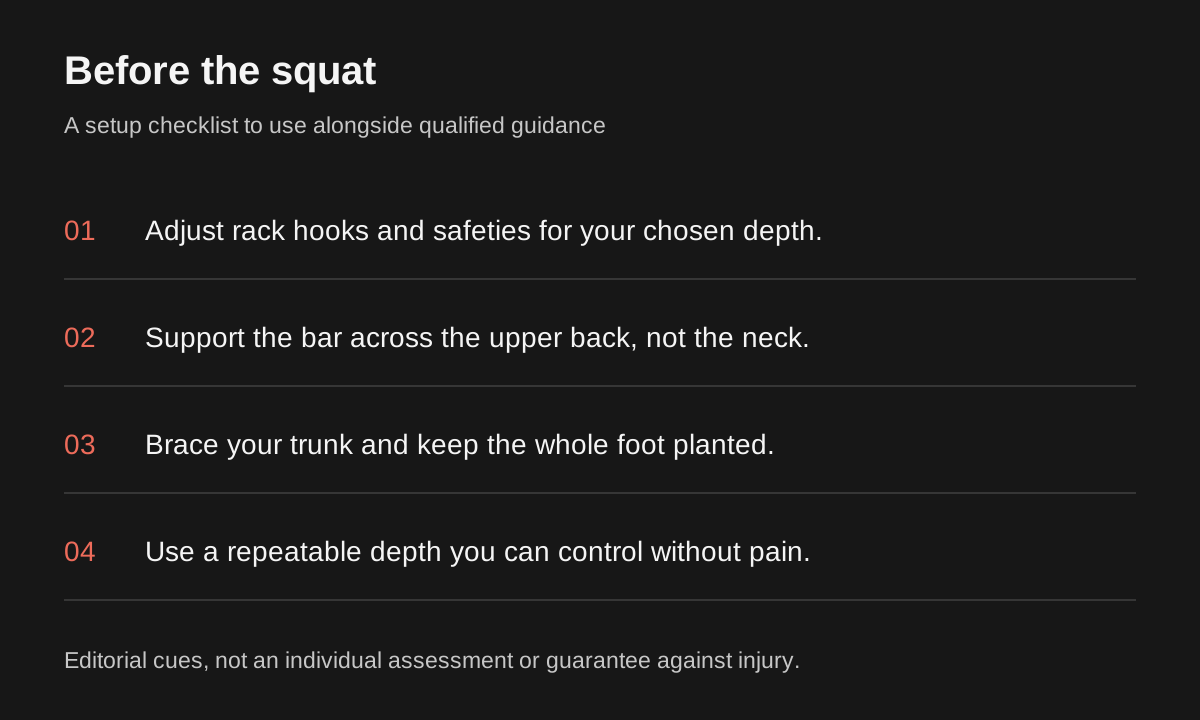
Editorial summary of the setup guidance below, informed by ACE and Barbell Medicine; not an individual technique assessment.
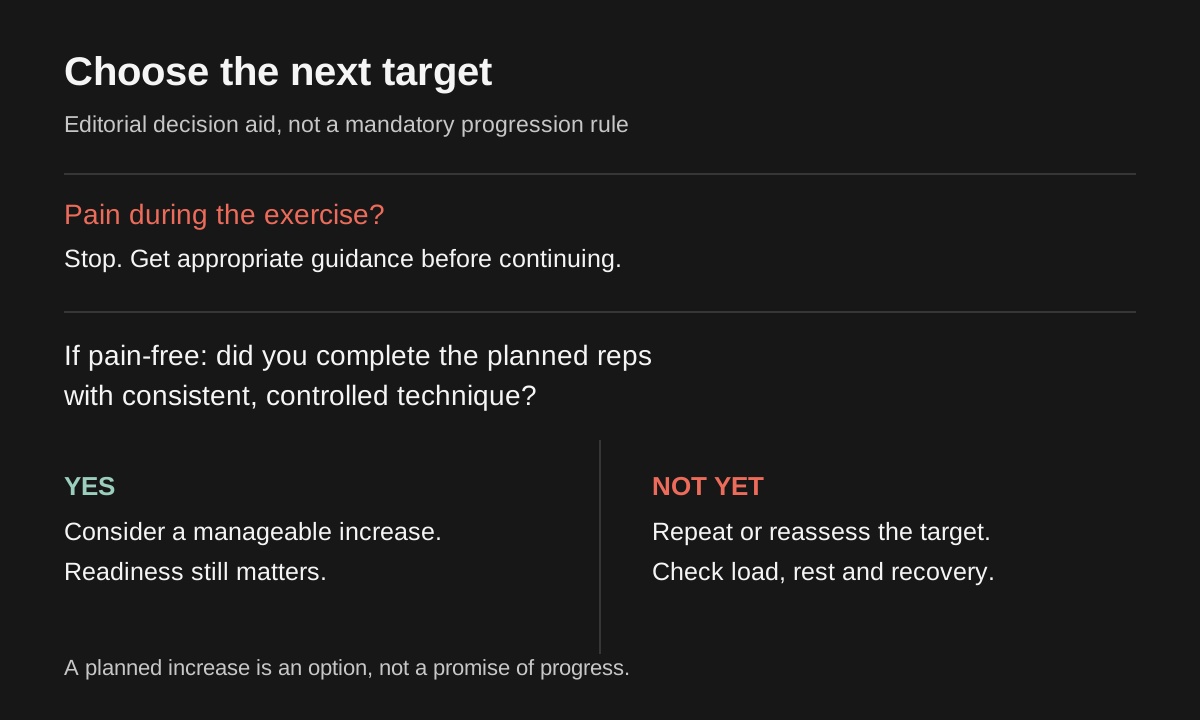
An editorial decision aid for the article’s progression example, not a fixed loading prescription.
Direct answer: how to squat with a barbell
Set the bar securely across your upper back, brace your trunk, take a stable stance, and squat down by bending knees and hips together. Keep the whole foot planted, let the knees track in the same direction as the toes, and stand back up without losing your brace.
Most good squat reps have these traits:
- Bar starts over the middle of the foot.
- Brace is set before the descent.
- Knees track over the toes instead of collapsing inward.
- Depth is repeatable from rep to rep.
- Hips and chest rise together out of the bottom.
If the bar shifts forward, your heels lift, or your lower back rounds hard at the bottom, reduce load and fix the position first.
For basic setup, see ACE’s back squat instructions. For why depth and stance vary, see Barbell Medicine’s squat guide.
Common squat mistakes and fixes
| Mistake | What it looks like | Possible contributor | Adjustment to try with less load |
|---|---|---|---|
| Knees cave in | Knees drift inward as you stand | Load too heavy, weak position, or poor foot pressure | Reduce load and cue knees in line with toes |
| Heels lift | Weight shifts toward the toes | Stance, ankle mobility, or balance issue | Keep the whole foot planted and slow the descent |
| Depth changes | Early reps are deep, later reps become high | Fatigue or load too heavy | Count only repeatable reps and stop the set sooner |
| Trunk position changes abruptly | You lose control near the bottom | Depth or load beyond current control | Reduce load and use a depth you can control |
| Chest shoots up late | Hips rise first and bar drifts forward | Poor brace or bar path | Pause lighter reps and keep hips and chest rising together |
Muscles worked
The back squat uses knee and hip extension, with the trunk supporting the bar. Muscle roles overlap rather than dividing neatly into muscles that move and muscles that only stabilize.
| Muscle group | Role in the squat |
|---|---|
| Quads | Extend the knees as you stand up |
| Glutes | Extend the hips out of the bottom |
| Hamstrings | Help transfer force between the hip and knee |
| Core and lower back | Brace the trunk so the bar stays controlled |
The anatomy and “Biarticular Muscles” sections of Stronger by Science’s squat guide describe these roles. This is a description of the movement, not a claim that one exercise covers every leg-training goal.
High-bar vs low-bar squat
| Variation | What changes | Editorial practice check |
|---|---|---|
| High-bar back squat | Bar rests across the upper traps | Find a stable bar position without resting it on the neck |
| Low-bar back squat | Bar sits lower across the rear shoulders | Check that you can hold the position comfortably before loading |
| Paused squat | Add a deliberate pause at your chosen depth | Begin lighter and keep the pause consistent |
| Tempo squat | Deliberately control the timing of the rep | Record the tempo so you compare like with like |
Neither bar position is automatically best. Pick the one you can perform consistently, pain-free, and with the goal you care about.
The practice checks are editorial suggestions, not comparative safety or performance rankings. Stronger by Science’s bar-position analysis explains why high-bar and low-bar mechanics can overlap substantially.
Setup checklist
| Setup point | What to do | Why it matters |
|---|---|---|
| Rack height | Set the hooks around upper-chest height | Lets you unrack without a calf raise or half squat |
| Safeties | Set pins or straps just below your intended bottom position | Provides somewhere to set the bar if you cannot stand up |
| Bar position | Place the bar on upper traps for high-bar or rear delts for low-bar | Controls torso angle and loading style |
| Stance | Start around shoulder width with toes slightly out | Gives the hips and knees room to move |
| Brace | Set abdominal and back-muscle tension before every rep | Helps maintain trunk position under load |
| Walkout | Use one or two steps back, then settle | Saves energy and improves repeatability |
Test the safety height with a light bar before loading it. Learn how to lower the bar onto the safeties with a qualified coach, before you need to do it during a failed rep. After a completed set, walk forward until the bar contacts both uprights, then lower it into both hooks. This rerack cue comes from “Re-racking the Weight” in Barbell Medicine’s guide; its earlier “Spotters” paragraph covers safety-pin placement.
Programming examples
These are separate editorial examples, not sets to combine into one workout or a personalized plan. Warm up with lighter practice sets first. Choose a load that leaves several controlled reps available, and rest until you can repeat the setup without rushing.
| Goal | Sets and reps | Notes |
|---|---|---|
| Beginner practice | 2 to 3 sets of 5 to 8 | Start light and make depth consistent |
| Strength | 3 to 5 sets of 3 to 6 | Use longer rests and stop before form breaks |
| Hypertrophy | 3 to 4 sets of 6 to 12 | Use controlled reps and a repeatable depth |
| Technique block | 3 to 5 sets of 3 to 5 paused reps | Useful when the bottom position is unstable |
One or two squat sessions in a week is an example of how a program might distribute practice, not a target everyone needs. Account for other leg training and recovery. General advice to start light and increase gradually appears in Healthdirect’s strength-training guide; the exact numbers above are not its prescriptions.
How to progress the squat
Progress the squat only when the reps still look like the reps you want to keep training.
| Situation | Next step |
|---|---|
| All planned sets reach your chosen depth, with controlled reps still available | Consider a small increase if your program calls for it |
| Last reps grind but form stays consistent | Repeat the same load before adding more |
| Depth shortens or knees cave late in the set | Keep the load or reduce reps |
| The movement causes pain | Stop the set; do not use another variation to push through symptoms |
| You miss the same target for two or three sessions | Reduce load, lower volume, or use a simpler variation |
The goal is not to add weight at any cost. The goal is to add load while keeping depth, bracing, and bar control honest.
Alternatives and regressions
The checks below are editorial suggestions for trying a different movement, not evidence that it is safer, easier, or better for a particular lifter.
| Alternative | What changes | What to check |
|---|---|---|
| Goblet squat | Hold a weight in front of the chest | A secure hold and a load that lets you repeat your chosen depth |
| Front squat | Support the bar in front of the shoulders | Learn the rack position with a light bar and check comfort |
| Box squat | Use a box as a depth target | A stable box at the intended height; do not drop onto it |
| Leg press | Use a machine rather than supporting a bar on the back | Ask staff to check the seat, stops, and usable range |
| Split squat | Use a staggered stance | Foot placement and support that let you control the rep |
Reassess load and range when changing exercises rather than carrying over back-squat numbers. No alternative is a guaranteed solution to pain.
Safety and troubleshooting
The troubleshooting table suggests technique experiments, not diagnoses. A visible change in knee or back position alone does not establish an injury or its cause.
Stop a painful set. Get clinical assessment for persistent or worsening symptoms; use a coach for setup and equipment skills. Healthdirect advises avoiding painful exercise and seeking individual guidance when training after injury.
The practical answer
Short answer
Use the barbell back squat when you want a compound lift that trains quads, glutes with clear progressive overload. It is most useful when you can keep the setup repeatable, move through a controlled range of motion, and add load or reps without changing the form.
The lift belongs in a program, not as a random challenge. Start with a load you can control, keep a few clean reps in reserve, and progress only when the working sets look the same from first rep to last rep.
Claim-source map
Technique references and editorial choices
We separate sourced exercise facts from editorial coaching judgment so the guide is easier to verify, update, and cite.
Setup and technique
The setup checklist, step-by-step cues, bar path, and range-of-motion guidance are practical cues based on the technique references.
- ACE: back squat(acefitness.org/resources/everyone/exercise-library/11/back-squat/) - Rack setup and basic movement cues; its below-knee example is not a universal depth requirement.
- Stronger by Science: squat hamstrings(strongerbyscience.com/how-to-squat/) - Hamstring anatomy and action across both the knee and hip.
- Stronger by Science: biarticular muscles(strongerbyscience.com/how-to-squat/) - Hamstring and rectus femoris force transfer between the knee and hip.
Muscles worked
Primary and secondary muscle claims come from exercise-library and biomechanics sources, then are translated into plain English.
- Stronger by Science: biarticular muscles(strongerbyscience.com/how-to-squat/) - Hamstring and rectus femoris force transfer between the knee and hip.
Sets, reps, and progression
Programming ranges are coaching defaults. Use them as starting points, then adjust load, volume, and frequency based on recovery and rep quality.
Safety and troubleshooting
Pain, regression, and mistake guidance is editorial coaching support, not diagnosis or medical advice.
- ACE: back squat(acefitness.org/resources/everyone/exercise-library/11/back-squat/) - Rack setup and basic movement cues; its below-knee example is not a universal depth requirement.
- Healthdirect: strength training for beginners(healthdirect.gov.au/strength-training-for-beginners) - Starting light, gradual loading, and avoiding painful exercise; not an exact squat prescription.
Fit check
Who this is for
This section is meant to help you decide whether the exercise belongs in your program, not just whether you can perform it once. A good fit means the movement matches your goal, equipment, current skill level, and ability to progress it without losing form.
Best fit
Lifters who want to build quads, gluteswith a movement that can be tracked and progressed over time.
Not ideal if
You cannot set up the movement consistently yet, feel joint pain during warm-ups, or need a simpler variation to learn the pattern first.
How to progress
Add reps first, then small weight jumps once every set stays controlled. If form changes, hold the load and earn cleaner reps before increasing again.
Technique
How to Do the Barbell Back Squat
- 01
Set the rack hooks at upper-chest height and safeties just below your intended squat depth. For high-bar squats, rest the bar across your upper traps, not your neck.
- 02
Grip the bar evenly, brace your core, lift it off the rack, and take one or two steps back into a stance about shoulder-width apart.
- 03
Brace your trunk and bend your knees and hips together, letting your knees track in the direction of your toes.
- 04
Descend to a depth you can control without pain, keeping your whole foot planted. Do not force below-parallel depth.
- 05
Drive through the whole foot to stand back up, exhaling near the top. Reset your breath and brace for the next rep.
Programming
How to program the Barbell Back Squat
The barbell back squat can be a main lift or an accessory within a program. Choose the load, repetitions, and sets together. Higher repetitions do not automatically mean an easier session or lower recovery cost; effort and total work also matter.
A simple progression is to keep the same weight until all working sets reach the top of the rep range with clean technique, then add the smallest practical jump next time. This keeps progressive overload tied to execution rather than ego.
Troubleshooting
Common barbell back squat mistakes
- Letting the knees cave inward under load instead of tracking over the toes.
- Shortening your planned depth as weight increases, making progress hard to compare.
- Losing control of your trunk position near the bottom.
- Rising onto the toes and shifting weight forward out of the hole.
Coach cues
Form tips to get more from it
- Brace as if bracing for a punch before every rep, not just the first.
- Point your toes out slightly to make room for your hips.
- Film a set from the side to check real depth instead of guessing.
- Consider adding weight only when every rep reaches your chosen depth with control.
References
Sources and freshness
General technique context from coaching and exercise-education references. Set, rep, and frequency examples are editorial illustrations, not individualized programming or a documented human safety review. The hero image is illustrative, not evidence of correct technique.
Sources
- 01ACE: back squat (Rack setup and basic movement cues; its below-knee example is not a universal depth requirement.)acefitness.org/resources/everyone/exercise-library/11/back-squat/
- 02Barbell Medicine: how to squat (Stance and depth guidance; the Spotters paragraph covers safeties and Re-racking the Weight covers contact with both uprights.)barbellmedicine.com/blog/how-to-squat/
- 03Stronger by Science: squat hamstrings (Hamstring anatomy and action across both the knee and hip.)strongerbyscience.com/how-to-squat/
- 04Stronger by Science: biarticular muscles (Hamstring and rectus femoris force transfer between the knee and hip.)strongerbyscience.com/how-to-squat/
- 05Stronger by Science: high-bar and low-bar squatting (Bar-position tradeoffs, not a universal ranking.)strongerbyscience.com/high-bar-and-low-bar-squatting-2-0/
- 06Healthdirect: strength training for beginners (Starting light, gradual loading, and avoiding painful exercise; not an exact squat prescription.)healthdirect.gov.au/strength-training-for-beginners