How to Do the Conventional Deadlift
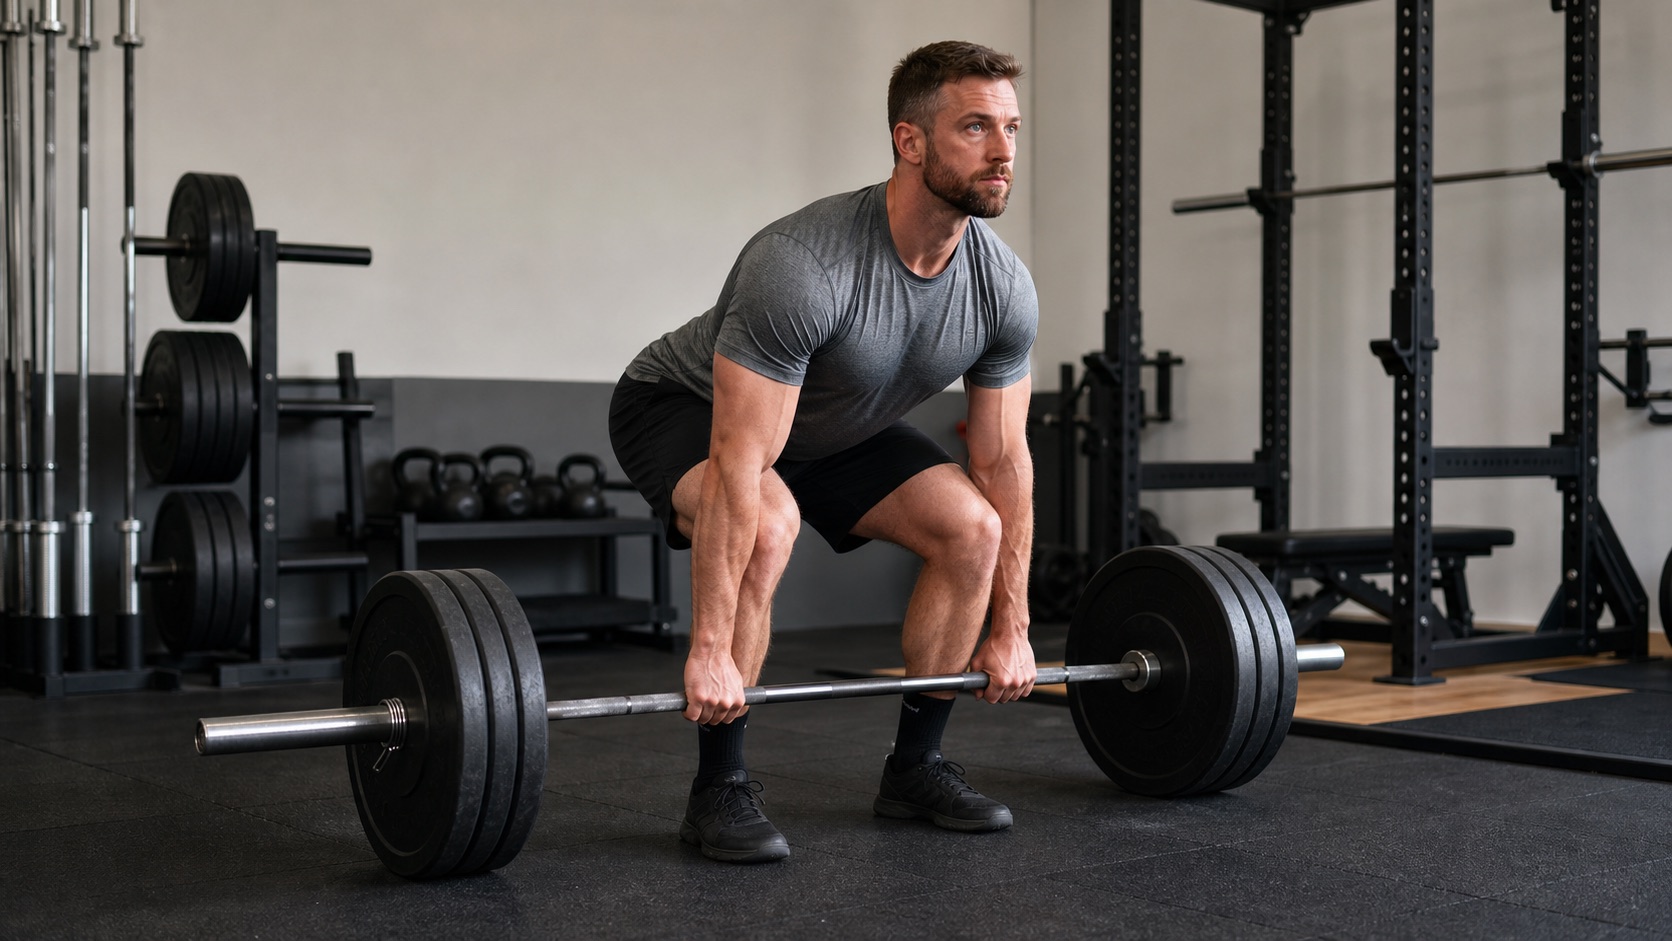
The conventional deadlift lifts a bar from the floor using the glutes, quads, and hamstrings, with the back and grip supporting the load.
Training scope: General exercise information, not an individual technique assessment. Editorial technique and programming guidance, not medical advice. Use qualified coaching or clinical care for pain, injury history, or movement-specific restrictions.
Primary muscles
Glutes, Quads, Hamstrings
Secondary muscles
Spinal erectors, Traps, Lats, Forearms
Equipment
Barbell
Level
Intermediate
Type
Compound
Typical reps
Examples: 3-5 for strength practice, 5-8 for muscle-focused sets
The conventional deadlift combines hip and knee extension to lift a bar from the floor. It trains the glutes, hamstrings, and quads while the back, grip, and trunk support the load.
The deadlift rewards patience and precision. A settled setup, a braced trunk, and a bar that stays close to your body make the lift more repeatable. How tiring it is depends on load, sets, reps, effort, and your other training.
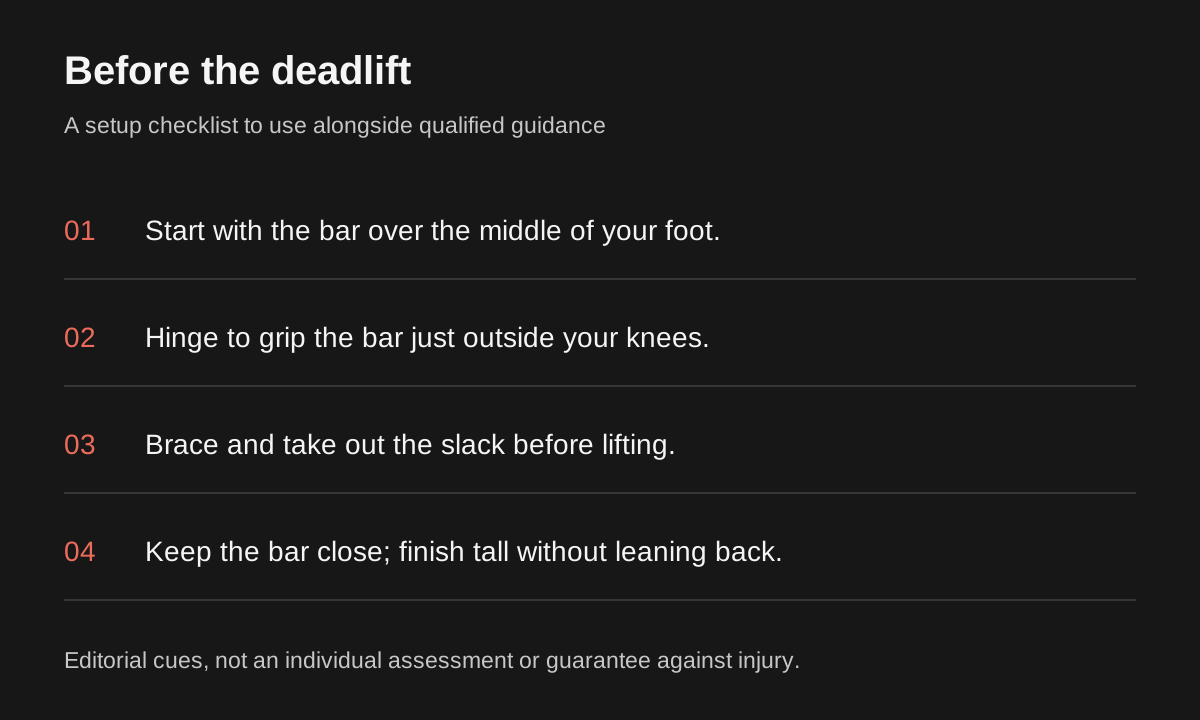
Editorial summary of the setup guidance below, informed by NASM and ACE; not an individual technique assessment.
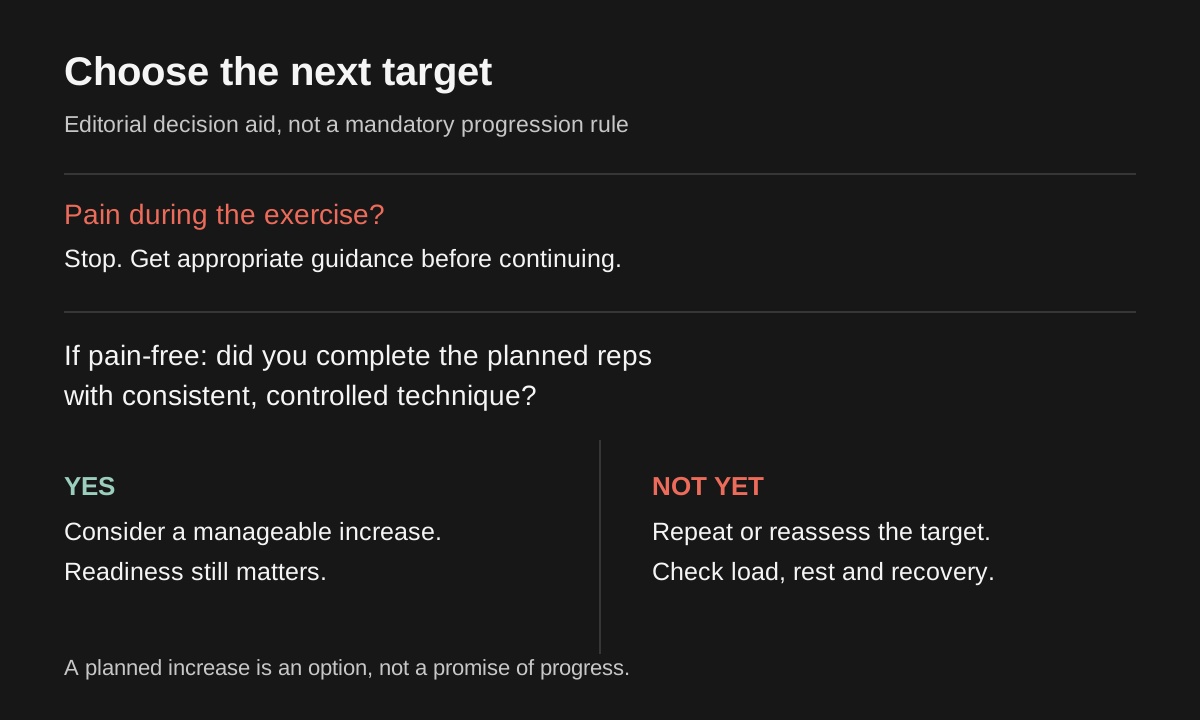
An editorial decision aid for the article’s progression example, not a fixed loading prescription.
Direct answer: how to deadlift
Stand with the bar over your midfoot, hinge down to grip it, and bend your knees enough to bring your shins near the bar without pushing it forward. Brace, take tension through your arms into the bar, then push the floor away. Finish standing tall, not leaning back.
Most good conventional deadlift reps have five traits:
- Bar starts over midfoot and stays close.
- Hips are high enough for tension, not squatted too low.
- Back position is braced before the bar leaves the floor.
- The bar breaks from the floor smoothly, not from a jerk.
- Lockout finishes with glutes and legs, not a lower-back lean.
If the bar drifts forward, the hips shoot up early, or the back position changes before the bar leaves the floor, reduce the load and rebuild the setup.
Setup checklist
| Setup point | What to do | Why it matters |
|---|---|---|
| Bar position | Start with the bar over midfoot | Keeps the bar close to your center of mass |
| Stance | Feet around hip width | Lets the arms hang just outside the knees |
| Grip | Grip just outside the legs | Keeps the pull narrow and efficient |
| Shoulders | Start slightly in front of the bar, not behind it | Helps the bar travel vertically instead of swinging forward |
| Lats | Squeeze the armpits down and back before the pull | Keeps the bar close to the body |
| Slack | Pull tension into the bar before it leaves the floor | Prevents jerking and losing position |
| Brace | Set abdominal and back-muscle tension before the pull | Helps maintain position under load |
Do not turn the setup into a squat. The deadlift is a hinge. Your knees bend, but your hips stay back enough that hamstrings, glutes, and back can all contribute.
NASM’s deadlift instructions describe midfoot setup, taking out slack, and controlled hip and knee extension. ACE’s exercise entry gives the basic hinge and return sequence. Treat stance measurements as starting cues, not fixed requirements.
Body-proportion adjustments
Not every good deadlift setup looks identical. Arm, thigh, lower-leg, and torso lengths work together; a label such as “long legs” cannot determine hip height by itself. Stronger by Science describes shorter arms as generally requiring lower hips farther behind the bar, not an automatic higher-hip setup.
| What you notice | What to consider | Useful adjustment |
|---|---|---|
| Your setup looks different from another lifter’s | Combined limb proportions affect torso angle and hip position | Judge balance and control rather than copying their hip height |
| You cannot reach the floor while controlling your trunk | Bar height, stance, and available range all matter | Try a lighter bar raised on stable lifting blocks; do not assume mobility is the only cause |
| Hips rise before the bar moves | You may be forcing the starting position too low | With less load, let the hips settle where you can take tension without rolling the bar |
| Grip limits | You cannot securely hold the planned load | Reduce the load; learn any new grip or straps separately with light practice |
The goal is a repeatable, balanced start. Use light practice and a side-view recording to see whether the setup survives the first part of the pull.
Grip options
Double overhand, mixed grip, hook grip, and straps are different ways to hold the bar, described in “Gripping the bar” in Stronger by Science’s guide. Mixed grip uses one palm facing each way; hook grip traps the thumb under the fingers. Straps connect the hands to the bar. Our editorial advice is to learn the setup and release with a qualified coach before using any unfamiliar option under load, rather than treating grip equipment as an automatic fix.
Muscles worked
The glutes and hamstrings contribute to hip extension, and the quads extend the knees. NASM’s muscle list classifies all three as primary muscles. Its secondary group includes the spinal erectors, traps, lats, and grip muscles, which support the trunk, bar, and grip.
Feeling muscular effort in the back is not, by itself, evidence of bad technique. Pain is a separate reason to stop the set, not a cue to brace harder and continue.
Programming examples
These are separate editorial examples, not a personalized plan or sets to combine into one workout. Warm up with lighter practice sets and use loads that leave several controlled reps available. Rest until you can repeat the setup without rushing.
| Goal | Sets and reps | How to use the example |
|---|---|---|
| Beginner hinge practice | 2 to 3 sets of 5 | Start light and reset between reps |
| Strength | 3 to 5 sets of 3 to 5 | Keep the setup consistent; these are not max-effort sets |
| Hypertrophy/accessory | 2 to 4 sets of 5 to 8 | Account for other hinges and leg work before adding sets |
| Technique work | 3 sets of 3 paused reps | Use less load than standard reps and keep the pause controlled |
A program might place deadlifts once per week and other leg work elsewhere. That is an example, not evidence that once weekly is optimal or suitable for everyone. Healthdirect supports starting light and increasing gradually, not these specific deadlift numbers. Add reps or a small load increase only when the planned sets remain controlled and recovery allows it.
Common technique adjustments
| Observation | Possible contributor | Adjustment to try with less load |
|---|---|---|
| Bar drifts forward | Bar starts too far away or lats are loose | Start over midfoot and squeeze the bar toward you |
| Hips shoot up first | Starting too low or no leg drive | Let hips start slightly higher and push the floor away |
| Back rounds before the bar moves | Brace is not set or load is too heavy | Reduce load and brace before pulling slack |
| Grip fails early | You cannot securely hold the load | Reduce the load and check your grip before continuing |
| Lockout leans back | Trying to finish with lower back | Squeeze glutes and stand tall without hyperextending |
Change one thing at a time. If you move the bar closer, change hip height, switch grip, and add straps all at once, you will not know which adjustment helped. These observations do not diagnose an injury.
Alternatives and variations
These are movement differences with editorial practice checks, not rankings of safety, fatigue, or likely strength gains.
| Alternative | What changes | What to check |
|---|---|---|
| Romanian deadlift | Start standing, then hinge with slightly bent knees | Choose a controlled bottom position rather than chase the floor |
| Trap-bar deadlift | Stand inside the bar and hold handles at the sides | Handle height and a load chosen for this variation |
| Sumo deadlift | Use a wide stance with hands inside the legs | Foot placement and control with light practice |
| Rack pull | Start with the bar supported on rack pins | Ask staff to check the rack and pin setup |
| Kettlebell deadlift | Lift a kettlebell held between the feet | A secure grip and suitable starting height |
| Block pull | Raise the plates on lifting blocks | Stable, matching blocks and a repeatable starting height |
| Paused deadlift | Pause deliberately during the pull | Begin lighter and keep the pause location consistent |
The Romanian and trap-bar entries in Stronger by Science’s variation section explain their different starting positions and grips. When changing movements, establish a new load and range rather than assume the variation is easier or carry over your conventional-deadlift numbers.
Safety and troubleshooting
Keeping the bar close reduces its leverage against the hips and back. That mechanical explanation does not mean bar drift proves an injury, or that a close bar makes a painful lift safe. Stronger by Science’s mechanics discussion explains the relationship between load and moment arms.
Common fixes:
- Move the bar closer before you pull.
- Pull slack out before the bar leaves the floor.
- Use a lighter load while you learn the brace.
- Reset each rep instead of bouncing.
- Stop the set when position changes.
Stop painful pulls. Persistent or worsening pain needs clinical assessment, not this table as rehabilitation advice. Back pain with leg numbness or weakness, or changes in bladder or bowel function, needs emergency assessment now. Go to an emergency department or call your local emergency number. Healthdirect’s back-pain guide explicitly distinguishes these warning signs from routine assessment; a technique coach is not the appropriate referral for them.
The practical answer
Short answer
Use the conventional deadlift when you want a compound lift that trains glutes, quads, hamstrings with clear progressive overload. It is most useful when you can keep the setup repeatable, move through a controlled range of motion, and add load or reps without changing the form.
The lift belongs in a program, not as a random challenge. Start with a load you can control, keep a few clean reps in reserve, and progress only when the working sets look the same from first rep to last rep.
Claim-source map
Technique references and editorial choices
We separate sourced exercise facts from editorial coaching judgment so the guide is easier to verify, update, and cite.
Setup and technique
The setup checklist, step-by-step cues, bar path, and range-of-motion guidance are practical cues based on the technique references.
- Stronger by Science: deadlift mechanics(strongerbyscience.com/how-to-deadlift/) - Load, moment arms, and the introductory short-arm setup example; not an injury diagnosis.
- NASM: barbell deadlift(nasm.org/resource-center/exercise-library/barbell-deadlift) - Midfoot setup, taking out slack, controlled hip/knee extension, and muscles worked.
- Stronger by Science: gripping the bar(strongerbyscience.com/how-to-deadlift/) - Double-overhand, mixed, hook, and strapped grip options.
Muscles worked
Primary and secondary muscle claims come from exercise-library and biomechanics sources, then are translated into plain English.
- NASM: barbell deadlift(nasm.org/resource-center/exercise-library/barbell-deadlift) - Midfoot setup, taking out slack, controlled hip/knee extension, and muscles worked.
- Stronger by Science: deadlift mechanics(strongerbyscience.com/how-to-deadlift/) - Load, moment arms, and the introductory short-arm setup example; not an injury diagnosis.
Sets, reps, and progression
Programming ranges are coaching defaults. Use them as starting points, then adjust load, volume, and frequency based on recovery and rep quality.
Safety and troubleshooting
Pain, regression, and mistake guidance is editorial coaching support, not diagnosis or medical advice.
- Healthdirect: back pain(healthdirect.gov.au/back-pain) - Clinical assessment and urgent warning signs, not deadlift rehabilitation programming.
- Stronger by Science: deadlift mechanics(strongerbyscience.com/how-to-deadlift/) - Load, moment arms, and the introductory short-arm setup example; not an injury diagnosis.
- Healthdirect: strength training for beginners(healthdirect.gov.au/strength-training-for-beginners) - Light practice, gradual loading, and avoiding painful exercise; not an exact deadlift prescription.
Fit check
Who this is for
This section is meant to help you decide whether the exercise belongs in your program, not just whether you can perform it once. A good fit means the movement matches your goal, equipment, current skill level, and ability to progress it without losing form.
Best fit
Lifters who want to build glutes, quads, hamstringswith a movement that can be tracked and progressed over time.
Not ideal if
You cannot set up the movement consistently yet, feel joint pain during warm-ups, or need a simpler variation to learn the pattern first.
How to progress
Add reps first, then small weight jumps once every set stays controlled. If form changes, hold the load and earn cleaner reps before increasing again.
Technique
How to Do the Conventional Deadlift
- 01
Stand with the bar over your midfoot, shins about an inch away, feet hip-width apart.
- 02
Hinge at the hips and grip the bar just outside your knees.
- 03
Bend your knees enough to bring your shins near the bar without rolling it forward. Set your trunk and pull the slack out; do not force your hips down into a squat.
- 04
Push the floor away and stand up, keeping the bar close to your legs without deliberately scraping them.
- 05
Lock out by squeezing your glutes, then hinge back and lower the bar under control.
Programming
How to program the Conventional Deadlift
The conventional deadlift can be a main lift or an accessory within a program. Choose the load, repetitions, and sets together. Higher repetitions do not automatically mean an easier session or lower recovery cost; effort and total work also matter.
A simple progression is to keep the same weight until all working sets reach the top of the rep range with clean technique, then add the smallest practical jump next time. This keeps progressive overload tied to execution rather than ego.
Troubleshooting
Common conventional deadlift mistakes
- Losing control of your trunk position as you lift.
- Letting the bar drift forward, increasing the mechanical demand on the back and hips.
- Jerking the bar off the floor instead of pulling the slack out first.
- Hyperextending or leaning back hard at lockout.
Coach cues
Form tips to get more from it
- Think push the floor away rather than pull the bar up.
- Keep the bar close; constant contact with your legs is not required.
- Reset your brace and bar position before every rep from the floor.
- Learn any new grip or lifting straps with light practice and qualified coaching before adding load.
References
Sources and freshness
General technique context from coaching and exercise-education references. Set, rep, and frequency numbers are editorial examples, not individualized programming or a completed human safety review. Mechanical demand is not the same as injury risk.
Sources
- 01NASM: barbell deadlift (Midfoot setup, taking out slack, controlled hip/knee extension, and muscles worked.)nasm.org/resource-center/exercise-library/barbell-deadlift
- 02ACE: deadlift (Hip-hinge and standing/return cues, not a universal grip or stance requirement.)acefitness.org/resources/everyone/exercise-library/6/deadlift/
- 03Stronger by Science: deadlift mechanics (Load, moment arms, and the introductory short-arm setup example; not an injury diagnosis.)strongerbyscience.com/how-to-deadlift/
- 04Stronger by Science: gripping the bar (Double-overhand, mixed, hook, and strapped grip options.)strongerbyscience.com/how-to-deadlift/
- 05Stronger by Science: deadlift variations (Definitions of Romanian, trap-bar, block/rack, and paused variations.)strongerbyscience.com/how-to-deadlift/
- 06Healthdirect: strength training for beginners (Light practice, gradual loading, and avoiding painful exercise; not an exact deadlift prescription.)healthdirect.gov.au/strength-training-for-beginners
- 07Healthdirect: back pain (Clinical assessment and urgent warning signs, not deadlift rehabilitation programming.)healthdirect.gov.au/back-pain